Are you facing the error DNS server not responding on Windows 10? No need to worry, because we have mentioned here the top 12 ways to fix this issue here.
Let’s start with the definition of DNS and then go through the solutions to fix the DNS server issues.
DNS (Domain Name System) translates domain names into IP Addresses that are easy for computers to understand. It is a directory of records for the Internet which helps us visit websites. Sites cannot be opened if DNS servers aren’t accessible.
Now let’s discuss the frequent problem, “DNS server is not responding on Windows 10”.
Wrong settings on your computer, router or errors on the side of your Internet provider will cause this problem.
To avoid it, follow the multiple solutions in this article but before trying the, restart your computer, modem + router try connecting again.
12 Solutions to Fix DNS Server Not Responding Error

we have put together 12 most effective solutions that will help you to get rid of the error “DNS server is not responding”.
1] Set DNS Server Manually
One way to fix this problem by following these steps:
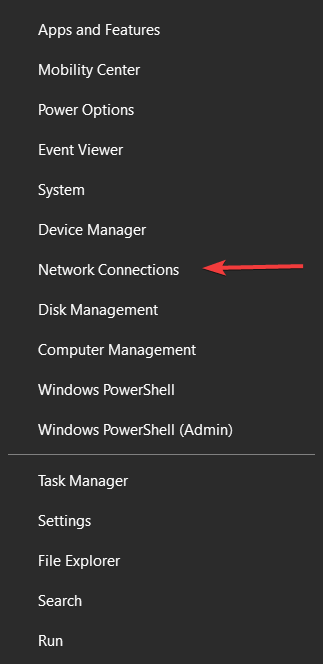
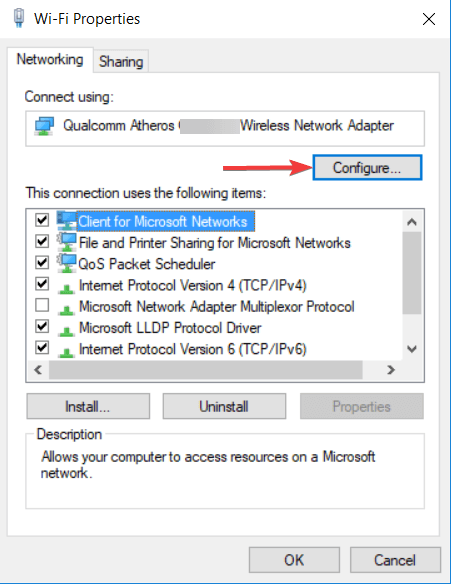
- Press Win+X button on your keyboard and choose the Network Connections You can also open the panel directly by pressing Win+X+W keys at a time.
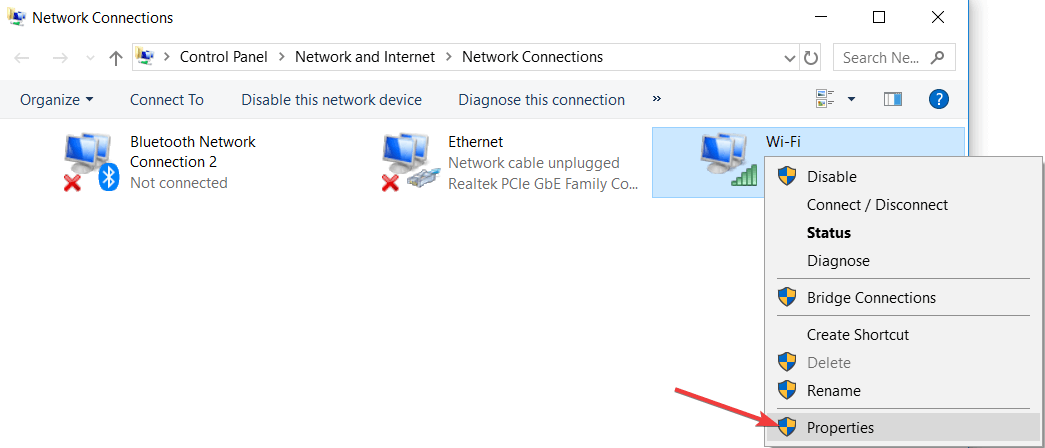
- Here, you will see a list of network connections and your job is to select the active network connection and then right-click on it and choose Properties.
- After getting the Properties window, choose the Internet Protocol Version 4 (TCP/IPv4)
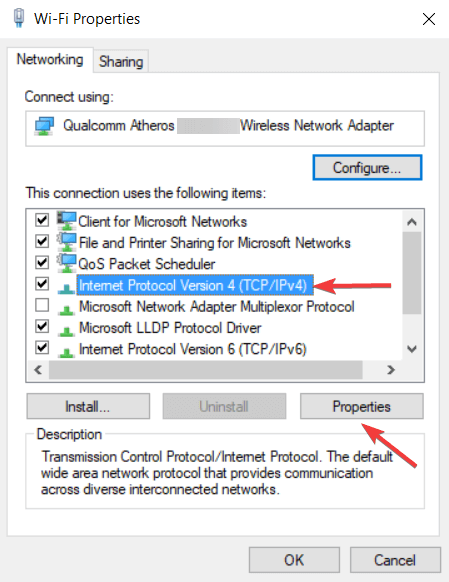
- Again you need to click on the Properties section after choosing the TCP/IPv4.
- Now, select “Use the following DNS server addresses”.
- Enter 8.8.8 at the place of the Preferred DNS server
- Again enter 8.4.4 / 208.67.222.222or 208.67.220.220 as an alternate DNS server.
- After adding the above details, Click the OKbutton to save changes when you’re done.
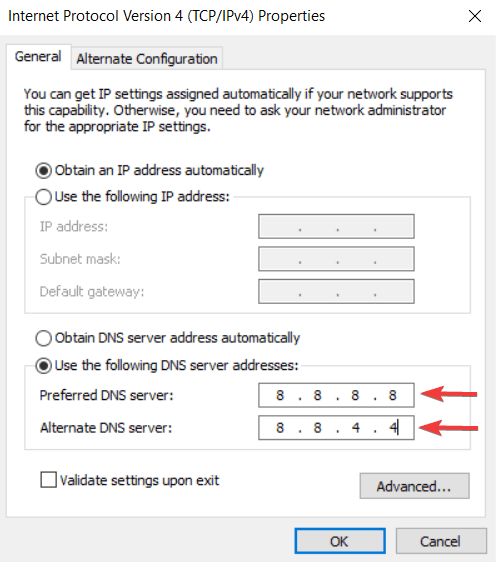
- You may need to disconnect from the Internet and reconnect to apply the changes.
2] Manually Set Your MAC Address
If your DNS server is not responding in Windows 10, then try setting your MAC address manually. This address will identify a piece of network equipment known as “physical address”. So to manually configure your MAC Address, note down your physical or MAC address and follow these steps:
- Open the Command Prompt window by pressing the Win + X + A keys simultaneously.
- Here, you will have to type getmac /v /fo list in Command Prompt and hit Enter key.
- Now note down the Physical Address of your active internet connection from the appeared list on CMD window and then close the Command Prompt.
In the next step, you need to configure your network connection. To do that, follow these steps:
- Open Network Connections by pressing Win+X+W keys and then go to the properties section followed by right-clicking on your active internet connection.
- Click on Configure has given inside the properties window.
- Now navigate to Advanced tab and select Network Address from the Property list.
- Click on Value and enter the MAC address that you noted from Command Prompt. Do not enter any dashes while entering your MAC address.
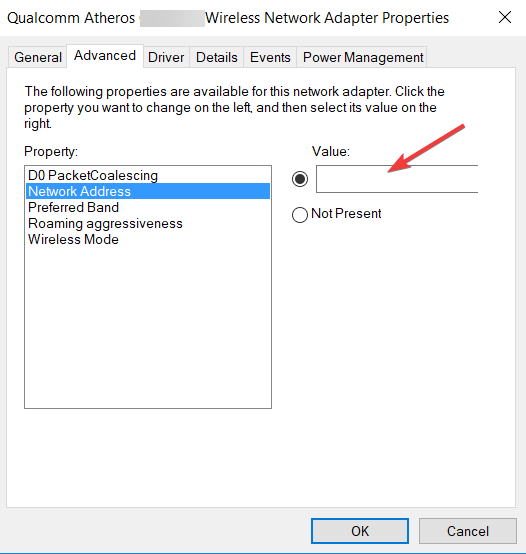
- Finally, click on the OK button to save the changes.
Also, take a look at how to fix Msvbvm50.dll missing error on Windows 10 can be solved
3] Disable Antivirus and Firewall in PC
Antivirus and firewall are necessary to protect your PC from malicious users, but it interferes with internet connections and causes DNS server failure in Windows 10. Temporarily disabling your antivirus and firewall client can fix this issue of “DNS server isn’t responding”. PC will still be protected by Windows Defender even if antivirus is disabled. So you need to change the configuration of firewall client or switch to a different client.
According to the reposts, Bitdefender Total Security antivirus tool cause this problem. Bitdefender users need to go to Firewall settings and disable the sharing option of Block Internet connection. After following these steps, the problem would resolve.
Avast can also cause this problem so simply open settings of Avast and disable the Secure DNS option. You can also disable the firewall on the router. This is a potentially dangerous solution that will make the PC completely vulnerable.
At first, try disabling your router’s firewall temporarily and see if the problem is resolved. If yes, turn it back on again and check the configuration of a firewall for the source of the problem. Check its instruction manual to see how to disable your router’s firewall.
4] Re-install Network Drivers if DNS Server isn’t Responding
Uninstalling the network driver and then re-installing has helped in fixing the DNS server error in Windows 10 most of the time. Follow the mentioned steps to execute the settings.
- Press the Windows button on your keyboard and then type the Device Manager.
- From the result, you need to click on the Device Manager
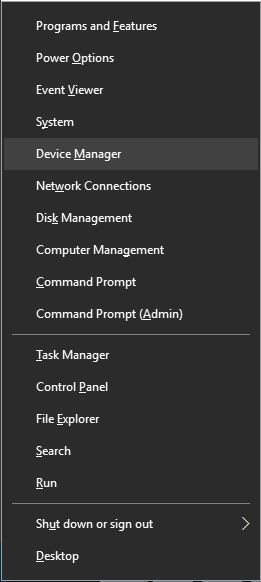
Note: You can also open the panel directly by pressing Win+X+M keys together. - Now scroll down and expand the “Network Adapters”.
- Right-click on the active network connection to uninstall the driver.
- Right-click on any other adapter option and select “Scan for hardware changes”.
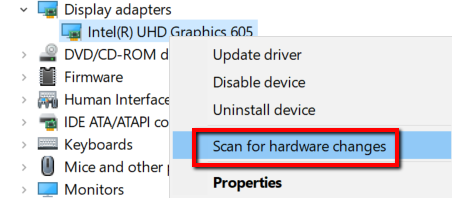
- The driver would re-appear otherwise disconnect your WiFi and re-connect.
5] Update Router’s Firmware
Few users report that Windows 10 DNS server not responding on a wireless network. This can be fixed by updating the router’s firmware. As this is an advanced process, one has to be extra cautious in order to avoid causing damage. Back up of settings should be done before updating the router’s firmware.
6] Use netsh Command
DNS server not responding error can be fixed by running a few commands from Command Prompt.
Follow the below steps to if DNS server is not responding on Windows 10:
- Open and run Command Prompt with admin privilege. You can use the short key Win+X+A to open this panel directly.
- Once it is opened, enter the following command one-by-one:
- netsh int ip reset
- netsh winsock reset
- ipconfig /flushdns
- ipconfig /renew
- Restart your computer once the execution of all commands has been done. This method will reset your IP and clear the DNS cache.
7] Restart Your Modem
- Restart your modem to fix DNS server not responding error on Windows 10.
- Now turn the modem off by pressing the power button.
- Again turn it on in the same way after 30 seconds.
- Now check if the DNS problem has been resolved.
8] Run PC in Safe Mode
It is a possibility that third-party applications like antivirus or VPN tools interfere with your Internet connection and causes Windows 10 DNS not responding error. In order to fix it, access the Internet from safe mode.
Also get Avast Secureline VPN License Key.
Keep in mind, the Safe Mode runs only with specific software and drivers. Follow these steps to enter Safe Mode in Windows 10:
- Press Win Key or click on the start menu
- Now click on the Power button given in the start menu.
- Press the Shift key on your keyboard and select Restart.
- Here, you need to choose the Troubleshoot from the options.
- Now, go to the Advanced options and then click on the Startup Settings and select the Restart
- Now a list of options will appear. Choose Safe Mode with Networking by pressing F5 key on the keyboard and then you will be able to enter into the safe mode panel.
Know more about How to Start Windows 10 in Safe Mode.
NOTE: Make sure your internet is working when you enter into a safe mode. If you face no issues while being in safe mode then it is clear that third parties are interfering. To fix this issue, a problematic application needs to be removed from the PC.
9] Disable MS Virtual WiFi Miniport Adapter
- Press Win+X+M keys at a time to open the Device Manager window and then click on “Network Adapter” from the list.
- Now, locate the “Microsoft Virtual WiFi Miniport” adapter list.
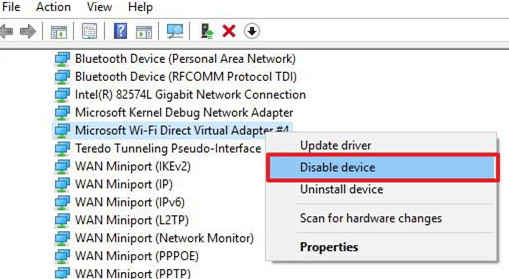
- Here, you will have to right-click on it and then select the disable
10] Disable all Additional Connections
Having multiple connections on your PC might cause DNS server is not responding error while using WiFi connection. To fix this issue, those connections need to be disabled from the Network Connections window.
- Open Network Connections window by following the steps given above
- Right-click on the connection one-by-one, which you want to disable and then select Disable.
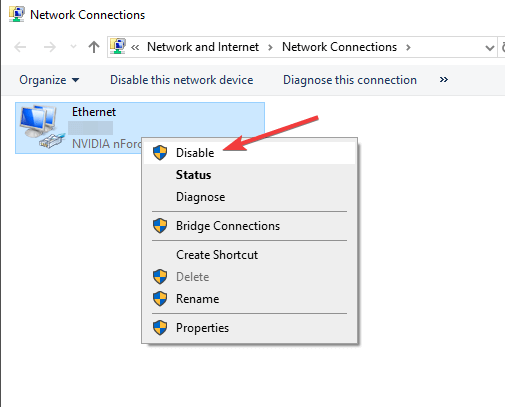
- Make sure to keep your active network connection enabled.
11] Turn off Peer-to-Peer Update Feature
Windows 10 now allows you to download Windows updates using peer-to-peer technology. Basically, this feature downloads Windows updates directly from other users in your area. This is a quite useful feature but it sometimes causes DNS server failure. One possible solution for DNS problems is to disable this feature.
- Press Win + I keys to open the Settings app in your Windows 10 OS.
- Find Update & security section and select Advanced options from there.
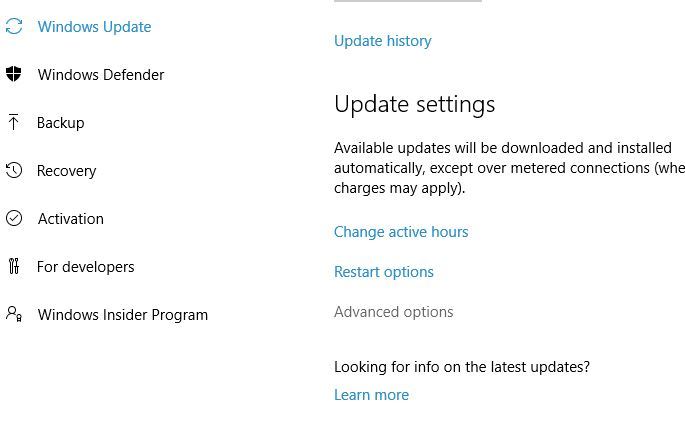
- Select Choose how updates are delivered.
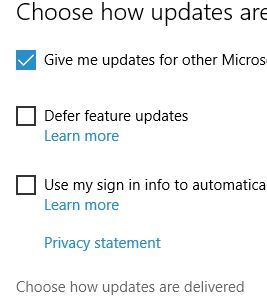
- Updates from more than one place option should be set to
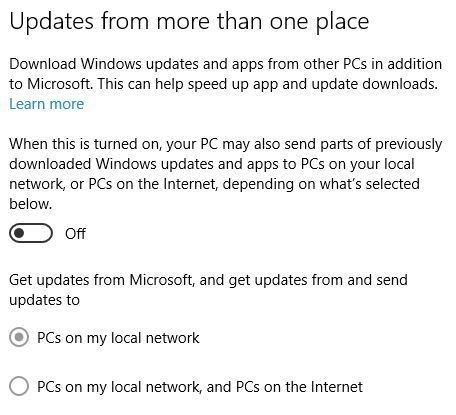
- Turning this feature off will resolve the DNS server failure issue.
12] Wait for ISP to Fix DNS Server not Responding Error
Sometimes ISP causes the DNS server not responding error. When ISP (Internet Service Provider) has some issues, it requires the user to wait for a few hours while technical difficulties are being resolved by the ISP.
Author’s Conclusion:
Users now don’t need to worry if DNS Server is not responding as the best possible solutions are provided above. Still, if you are facing any issue during the process to resolve the Windows 10 DNS server is not responding, let us know in the comment section below. Our experts would love to help you to fix the issue.
Leave a Reply