Create a virtual machine on windows 10: A Virtual Machine is a tool that enables the user to access the separate OS within the existing one in the same device. This will help the user to test the software or to develop the same on various OS in a single device. For example, if you are a Windows user and need to access the features of Linux, then with the use of Virtual Machine, you can fulfill your desire.
So, if you want to access different OS using Virtual Machine on Windows 10, then you have landed on the right place. Here, you will get comprehensive information about the same. Now, go through the next stanza to know how to create a Virtual machine on Windows 10.
Before moving ahead, you must know the limitation of the virtual machine. No doubt, a virtual machine is a very useful tool, but operating multiple OS in a single device slows down the system. To access the virtual machine, you need to be tech-savvy to resolve the hardware issues like the support of the same is rarely found, so you need to do all of the research to fix the issues. However, if you skip these demerits, then, of course, a virtual machine is a great tool. Now, let’s move ahead to create the virtual machine on Windows 10.
How to Check Whether Windows 10 is Supporting Hyper-V or Not?
Microsoft is the king of software; hence it provided the tool, i.e. Hyper-V that will help the users to create a virtual machine. The software is really good, but some applications or hardware may not work smoothly in a virtual machine. If you are ready to access the same on your device, then you need to know whether your OS supports Hyper-V or not and for that follow the steps listed below.
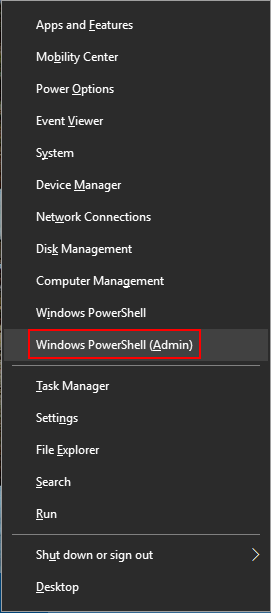
- Move your cursor to the Start menu, right-click on it and then select Windows PowerShell (admin).
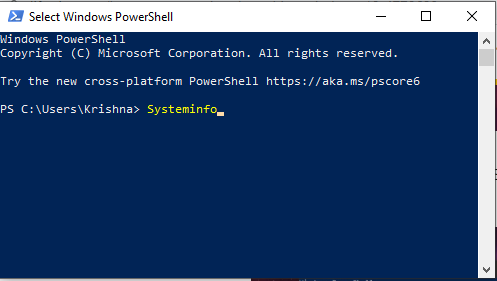
- Now type systeminfo in the command box of PowerShell and then press the Enter
- Thereafter, you will get the features of your system, scroll down the page and move to the Hyper-V
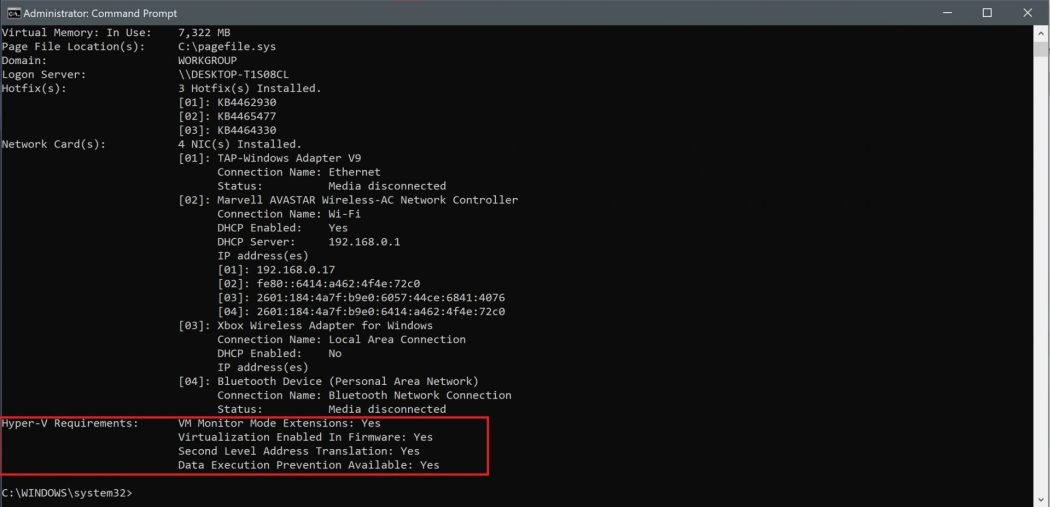
- Here, you will find the Hyper-V requirement section and parallel to the same, the status will be shown and if it is showing Yes, then you can use Hyper-V to access Virtual Machine on Windows 10.
Enable Hyper-V to Create a Virtual Machine on Windows 10
By default, Hyper-V is disabled and you need to enable the same to create a virtual machine on Windows 10 and for that follow the quick steps listed below.
- Type “Hyper-V” in the taskbar’s search field and press the Enter key on your keyboard.
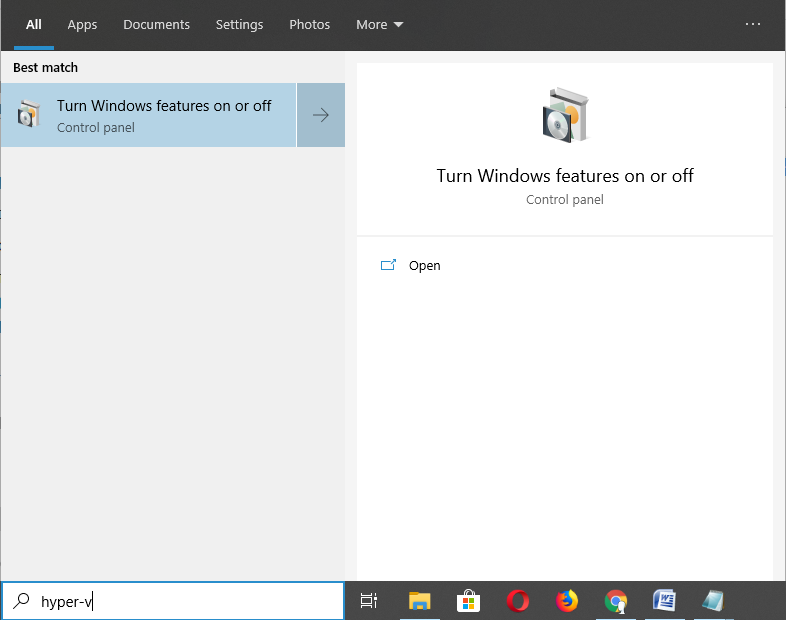
- Soon, Windows features pop-up window will open and here you need to select Hyper-V and then click on the OK button. Make sure to select all the included features of Hyper-V and they should be tick marked.
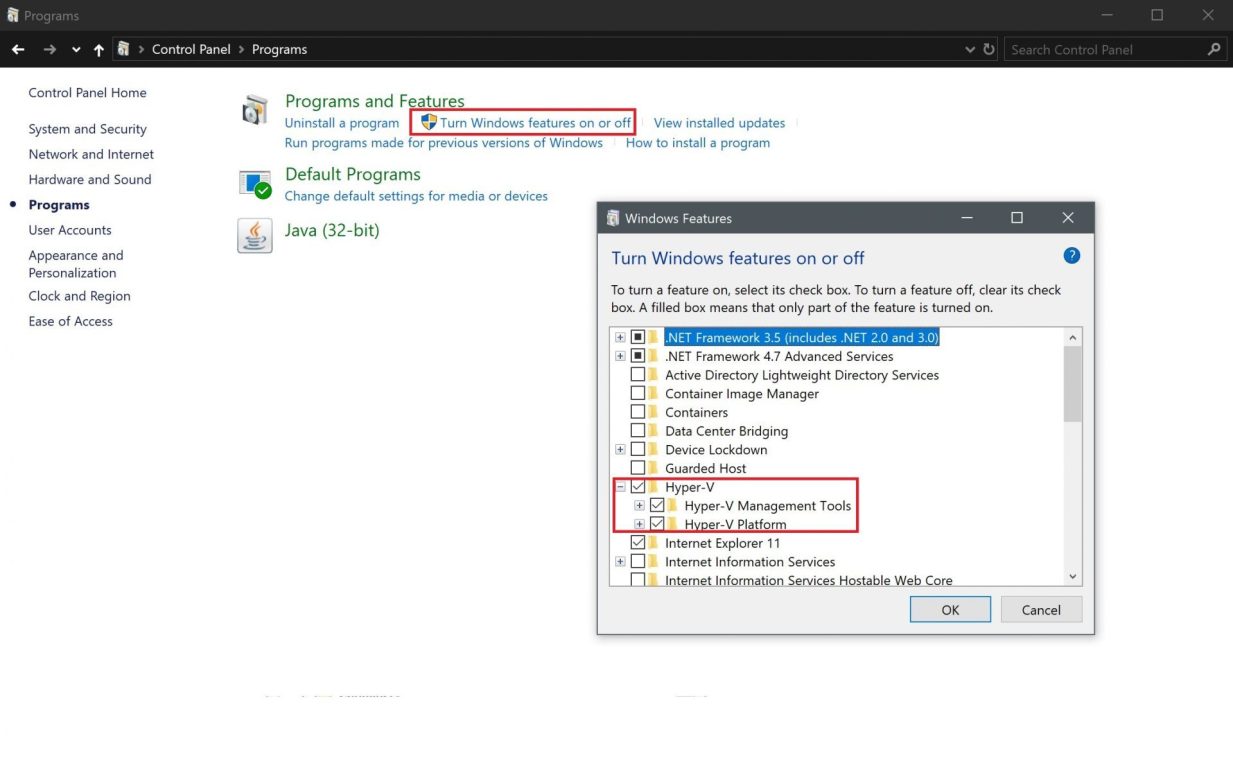
- After that, your PC will reboot to make the changes.
- Well, you have reached the half-mile and enabled the Hyper-V software and now, it’s time to create a virtual machine in Windows 10 and for that, go for the steps provided below.
How to Create a Virtual Machine On Windows 10?
- You can use the Hyper-V Manager to create the virtual machine on Windows 10 and for that, press the Start button, type Windows administrative tools and then press the Enter key.
- Thereafter, a new window will open that will show the list of administrative tools, select Hyper-V Manager.
- After that, a pop-up window will appear on the screen, move to the Actions section located at the right panel and then choose the Quick Create
- Soon, you will find the list of Operating System on your screen; you can select the one and then click on Create Virtual Machine. However, if you don’t want to access any of those listed OS and wish to choose the desired OS, then click on the Local Installation Source button, which is located at the bottom left of the page.
- Now click on change installation source and make sure to click on the checkbox stating “This virtual machine will run Windows”.
- The above step will direct you to another page where you can browse for the ISO image of OS that you want to access on a virtual machine. Select it & click on the Open
- In the next step, you will have to click on Create Virtual Machine.
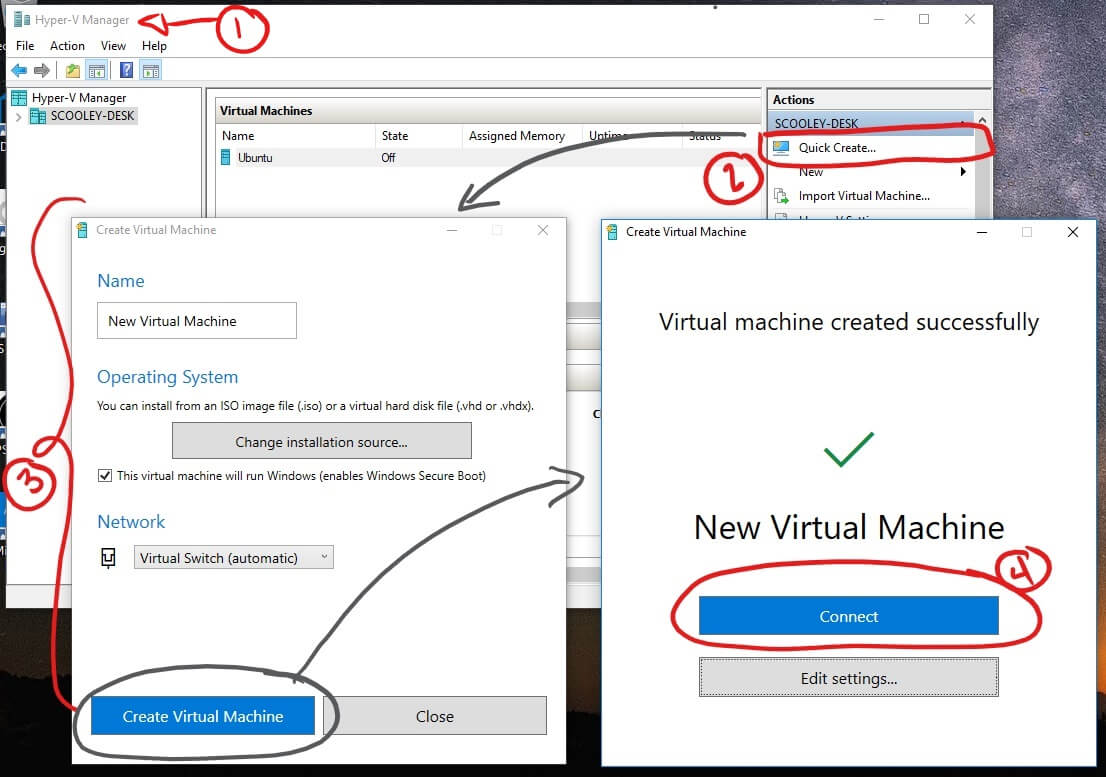
- Soon, Hyper-V will install the OS that you have selected.
- After the completion of the process, Hyper-V will give you two options, Connect and Edit. You must click on Connect to proceed ahead.
- Thereafter, you will have to Turn ON the Virtual Machine and for that click on the Start button that appears on the VM screen.
- Now, select the language you prefer and click on the Continue button.
- After completing the installation process, you can access the OS on Windows 10 Virtual Machine.
That was all about the ways to enable and create the virtual machine in Windows 10. But, if you switch to the existing OS and want back to access the Virtual Machine then you will have to use Hyper-V Manager and the process to load the virtual machine is provided below.
An Effective Way to Load Virtual Machine
- Press the Start button, type Windows administrative tool in the search bar and then press the Enter key.
- Select Hyper-V Manager from the featured list.
- Thereafter, the Hyper-V window will open and here you need to highlight the virtual machine.
- Now, click on the Connect button that is located under the Action section at the right panel.
- After that, a Virtual Machine Connection window will open and here you will have to click on the Start button to access Virtual Machine in Windows 10.
Conclusion
So, this was the comprehensive method to create, enable and connect Windows 10 Virtual Machine. On the off chance, if you stuck during the operation part, then feel free to ask by posting the issue in the comment box. We will help you in all possible ways so that you can access the features of Virtual Machine on Windows 10.
Leave a Reply