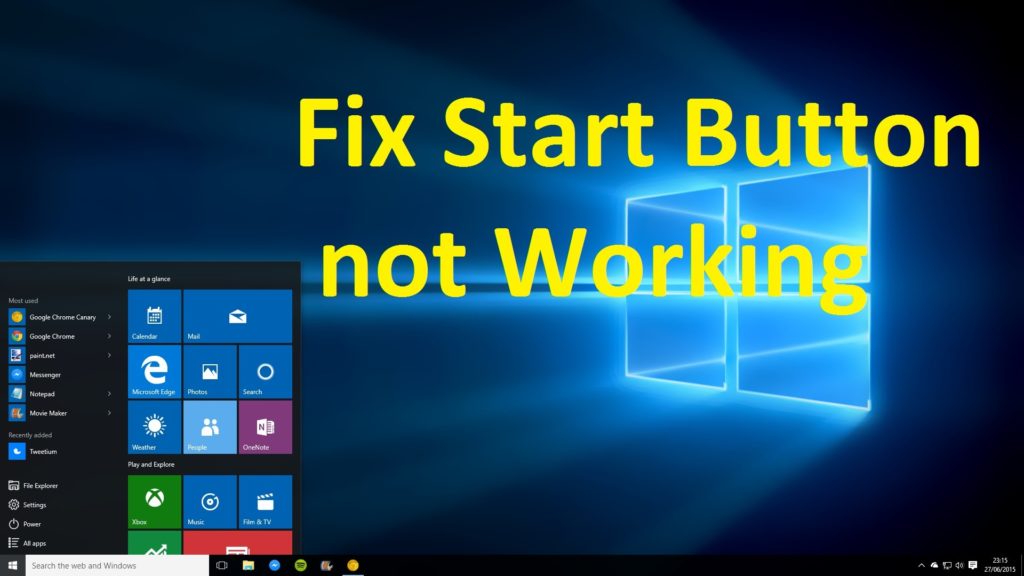
The Start Menu is the critical point to navigate the features of Windows 10. The start menu makes the work easier and saves time. But, in Windows 10, bugs are quite common and one such is the ‘Windows 10 Start Menu not working’. If you have met with this issue and failed to resolve the same by applying all possible ways which come in your mind, then don’t worry as here you will find some efficient and comprehensive solutions which will help you to get rid of the critical error – Start Menu not working issue.
6 Methods to Fix Windows 10 Start Menu not working

Here 6 smart ways to fix start menu not working in windows 10 are listed below.
- Update Windows 10
- Repair Corrupt Windows Files
- Create a new account
- Use Windows Troubleshooter
- Turn off the third party Antivirus
- Restart Windows Explorer
We will check them one by one in detail.
Method 1: Update Windows 10 If Start Menu Not Working
In most cases, bugs are fixed by updating Windows 10. Microsoft regularly improves the features of Windows 10 so that the users can efficiently access the features. So, to resolve the issue ‘Start menu not working Windows 10’ you need to update the Windows 10. Mostly, Windows 10 performs this automatically when it is set in automatic mode, but if the same is disabled, then you will have to go through the manual process. Well, the method to update Windows 10 is simple and for your convenience, the detailed step by step guidance is provided below.
- Press the ‘Windows’ logo and ‘R’ key simultaneously to open the ‘Run’ box.
- Now, type ms-settings: in the box and then press the ‘Enter’ key.
- Thereafter, a Setting page will appear on your screen and you need to click on ‘Update and Security’.
- Soon, you will find a Windows Update page that will show the ‘Check for Update’ button, click on it.
- Now, wait for a while because Windows will take time to update the system.
- After completing the above task, you will need to reboot your computer.
That was the initial and basic solution against the issue ‘windows 10 start button not working’. Possibly, it will fix the issue, but if the error persists then go for the advanced solutions which are listed below.
Method 2: Repair Corrupt Windows Files
If the system files get corrupted, then it may lead to a critical error start menu and to resolve the same, you will have to repair the corrupted files. Now, follow the steps listed beneath to fix the error.
- First and foremost, hover your mouse cursor to the Taskbar and then right-click on it to choose ‘Task Manager’.
- Soon, a pop-up window will appear and here you need to click on the ‘File’ tab which is located at the top of the page and then select ‘Run new task’ from the drop-down menu.
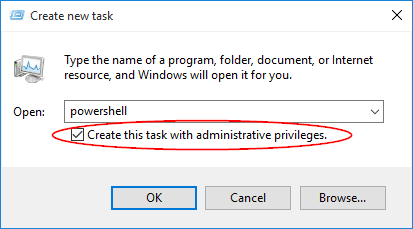
- Now, type ‘Powershell’ in the box and then click on the ‘OK’ button. But before that, make sure to click on the checkbox ‘Create this task with administrative privileges’.

- Thereafter, a Windows Powershell page will open and you need to type sfc/scannow and then press the ‘Enter’ key.
- After the completion of the process, if you found a message stating that ‘Windows research protection found corrupt files’ then you need to perform more tasks to fix the corrupt files which will help you to resolve start menu not working issue.

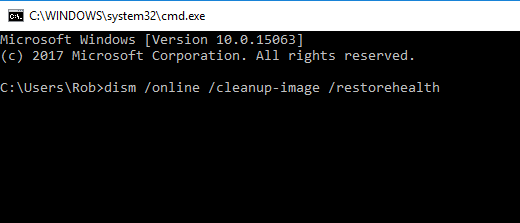
- In the Windows Powershell box, type ‘DISM/Online/Cleanup-Image/RestoreHealth’ and then press the ‘Enter’ key. But make sure to be online as Windows will need the internet to download the fresh files to replace with the corrupted one.
Method 3: Create a New Account to Resolve Windows 10 Start Button Not Working
- If you are logged in to the system, then move to the Taskbar right-click on it and then choose an option ‘Task Manager’.
- Thereafter, a Task Manager window will open and you need to click on the ‘File’ tab that is located at the top of the page.
- Clicking the ‘File’ tab will give you a few options, select ‘Run new task’.
- Now type ‘Powershell’ in the box provided to you and further click on the ‘OK’ button.
- The above step will direct you to the PowerShell Window here you need to type ‘net user XYZ 123/add’. Here, XYZ is the username and 123 is the password, you can set them as per your desire.
- After completing the above task, restart your computer and then log in to the system with a newly created account.
- Now your start menu should work.
Method 4: Use Windows Troubleshooter to Resolve Start Menu Not Working in Windows 10 Issue
Windows Troubleshooter is a very important and beneficial tool which resolves the issue in a quick time without much hassle. So, you must access this tool to resolve the Windows 10 Start menu not working issue.
- First and foremost you need to press the ‘Windows’ logo and ‘R’ keys together to open the ‘Run’ box.
- Now, type ms-settings: in the box and then press the ‘Enter’ key.
- Soon, you will be directed to the settings page and here you need to click on ‘Update and Security’.
- At the left panel of Windows Update, you will find a few options, click on ‘Troubleshoot’.
- Now, select the issue from the featured list of troubleshooter and then click on ‘Run the troubleshooter’.
Method 5: Turn off the Third-Party Antivirus
If you have installed any third-party antivirus such as Norton, AVG or other, then disable it temporarily, might be they are obstructing the way of Start menu and if turning off the antivirus bring back the Start menu in normal mode, then you can disable the third-party antivirus permanently. Microsoft has already provided Windows Defender to protect you from malware, spyware, and viruses. So, you don’t need to worry about the threats amid accessing the browser or downloading the files.
Method 6: Restart Windows Explorer
If Windows 10 Start button not working is the issue and amid pressing the button, you don’t get any response then you can fix the issue by restarting Windows Explorer. The process for the same is listed below.
- Move to the ‘Taskbar’ and then right-click on it to choose ‘Task Manager’.
- Thereafter, Task Manager pop-up window will open and here you need to click on the ‘Processes’ tab located at the top of the window.
- Soon, you will get the list of applications and system files; navigate for ‘Windows Explorer’.
- After getting the Windows Explorer, select the same and then click on the ‘Restart’ button located at the bottom of the page.
- That’s it; critical error start menu not working will be solved.
Conclusion
So, these were the methods to fix windows 10 Start menu not working issue. However, if you need any assistance, then feel free to ask and our techies will offer an effective solution against the issue. Hence, stay tuned and enjoys the ultimate features of Windows 10 without any interference.
Leave a Reply