Looking for a way to disable Superfetch? Get 3 effective and comprehensive methods from here. Windows 10 OS offered multiple and advanced features to the users and one such is the Superfetch. It runs in the background and constantly monitors the apps which consume the RAM memory.
What is Superfetch in Windows 10?

Superfetch is a windows inbuilt feature which analyzes the RAM memory and enables the users to access the app effectively as it marks those apps which are frequently used and hence preload them in RAM in a short period. In short, you can say, Superfetch launches the app in a much faster way due to preloading feature in the RAM memory.
In spite of the great feature of Superfetch, it has some disadvantages and because of that users get RAM usage error. Let’s have a quick glance at the problems which come with the Superfetch.
Disadvantages of Superfetch
- The Superfetch consumes the RAM memory to perform the task.
- It slows down the system.
- Superfetch is the prime reason behind RAM usage error.
- Windows 10 comes with the SSD and it really launches the app at high speed and thus eliminates the preloading feature.
- If you love to play a games, then Superfetch will not allow you to access the games smoothly because it will consume the RAM memory to launch the app and due to the same, heavy games that need more RAM will fail to access and even though you installed such games then you will be asked to free up the memory.
However, if you have installed SSD on Windows 10 or want to get rid of Superfetch, then you can disable it. Turning off the Superfetch won’t affect the system, but if everything is going smoothly, then don’t disable it. But, if you are frequently getting the RAM usage error on the display, then turn off Superfetch. The process is simple and a detailed method is listed below.
How to Disable Superfetch: 3 Comprehensive Methods
There are three methods to disable Superfetch and you can choose anyone to accomplish the task. Now go through each method and apply the one which suits you the most.
Method 1: Turn off Superfetch using Service Feature of Windows 10
- Open the ‘Run’ box by pressing the ‘Windows’ and ‘R’ keys simultaneously.
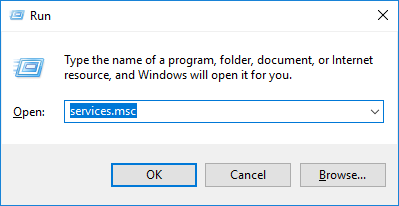
- Now, type ‘services.msc’ in the box and then click on the ‘OK’ button.
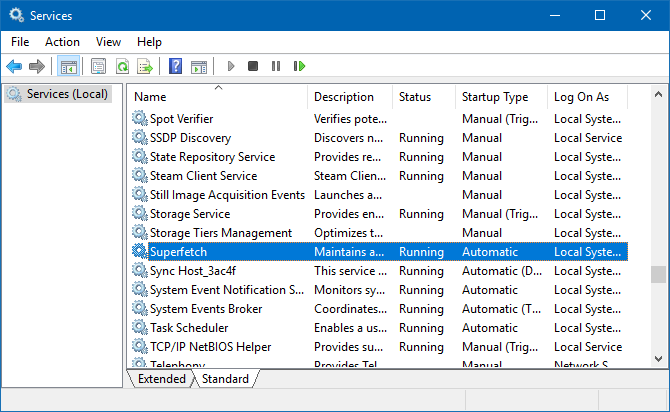
- Thereafter, the Windows service page will open and you need to navigate for the ‘Superfetch’.
- After getting the Superfetch, select it and then right-click on it to choose ‘Properties’.
- Soon, a new pop-up window will open and here you need to click on the ‘General’ tab located at the top of the page.
- Now, move to the ‘Startup type’ section, click on the arrow button and then select ‘Disabled’.
- After completing the above task, click on the ‘Stop’ button, located beneath the service status.

- Now, click on the ‘OK’ button to apply the changes.
Also read: Best methods to disable Cortana on Windows 10
Method 2: Stop Superfetch using Command Prompt
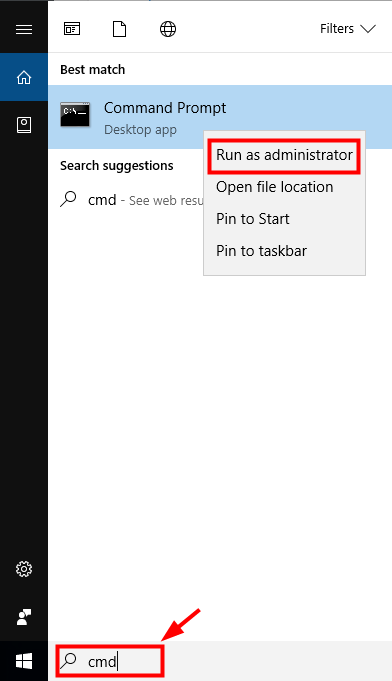
- Click on the Start button, type CMD in the search bar and then select command prompt from the search result, right-click on it and then choose an option Run as administrator.
- Thereafter, you will find a command box on the screen and here you need to type a command in the box i.e. sc stop “SysMain”. or “net.exe stop superfetch”
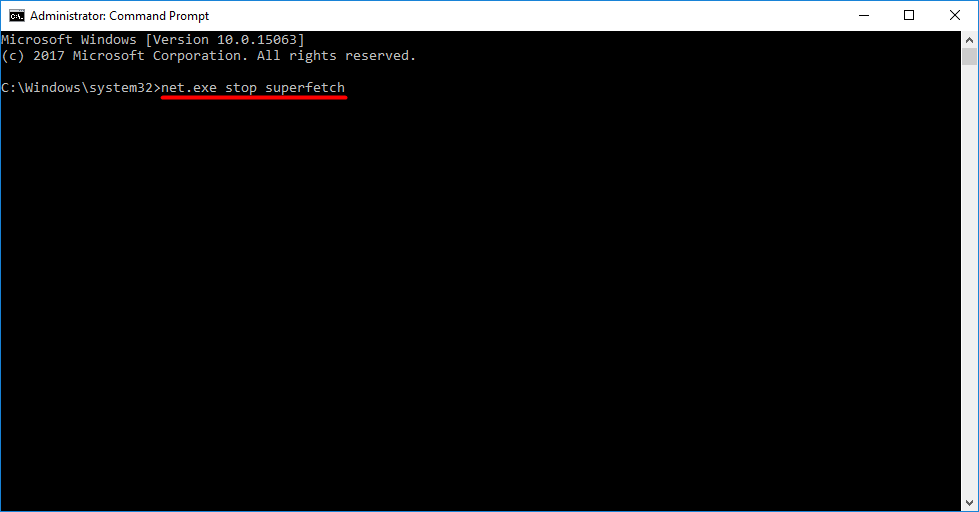
- Type “sc config sysmain start=disabled” and press Enter
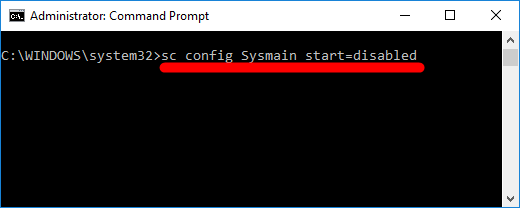
- Soon, you will find the success message in the command box and after getting the same, close the box.
Method 3: Disable Superfetch using Registry Editor
- Press the ‘Windows’ and ‘R’ keys together to open the ‘Run’ box.
- Type ‘regedit’ in the box and then hit the ‘Enter’ key.
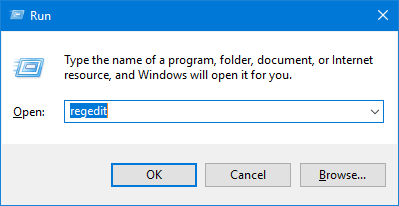
- Soon, a Registry Editor pop-up window will appear on the screen.
- Click on the ‘Computer’ arrow and select ‘HKEY_LOCAL_MACHINE’.
- Now double click on ‘HKEY_LOCAL_MACHINE’ and select ‘SYSTEM’.
- After selecting the SYSTEM icon, double click on it and then choose ‘CurrentControlSet.’
- Now click on the arrow button located at the left end of ‘CurrentControlSet’ and select an option ‘Control’.
- In the ‘Control’ folder you will get various sub-folders, navigate for the ‘Session Manager’, click on it and then select ‘Memory Management’.
- In the ‘Memory Management,’ you will get two options, click on the folder ‘PrefetchParameters’.
- Now move to the right end of the pop-up windows and here you will get few files, select ‘Enable Superfetch’ and then double click on it.
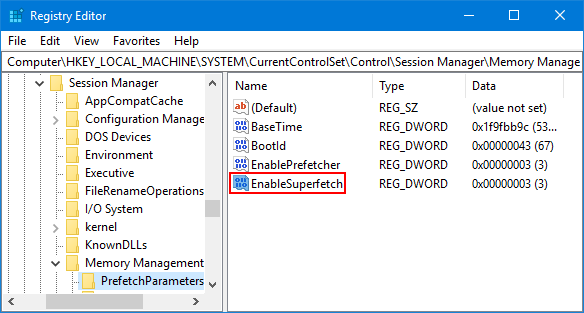
- Thereafter, a new pop-up window will open and here you need to type 0 in the ‘Value data’ box.
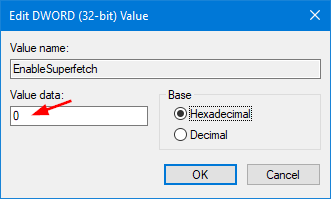
- To disable SuperFetch, change Value Data to ‘0‘ and click on the ‘OK’ button.
Conclusion
So, these are the three effective methods to disable Superfetch. Now the ball is in your court and you can choose any one of the listed methods to turn off Superfetch. On the off chance, if you stuck amid the method, then don’t worry just post the issue in the comment box and our techies will help you to resolve the issue. Hence, be in touch with us to access the salient and advanced features of Windows 10.
Leave a Reply